Bitmoji fun with animation in Google Slides
The Bitmoji fun is continuing in my Google Classroom. My students loved my Google Classroom Banners that I made (check out my last post below for how to) and have been making their own and sharing them with me (minus the bitmojis as they are only in year 4/5). Each day after school I have been choosing one of the ones they’ve made and uploading it to the Google Classroom Banner. Some days the student sends me a message that night so excited! Their enthusiasm and anticipation around it makes me laugh out loud.
That brings us to fun tip #1 – If you haven’t shared the fun with your students – get on it! Want some instructions to give your students to make their own – there’s a free editable one ready to download in my TPT store.
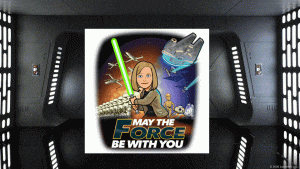
Ok, so I shared the fun with my class, but I was ready to take my own fun up a notch and try the animated slides. Not sure what I mean? Remember those flip books you used to make as a kid where you drew the pictures just a little bit over and flipped the book really fast and it looked like it was moving? Kind of like that. This is my first play around – ready for my big reveal in class on May the 4th (Be With You)! Click on the image to check out the animation.
This brings us to to fun tip #2 – animate your banner or slides! Want to know how, just read on.
Start off by opening up a new Google Slide and give it a name. Your next step is to decide what sized slide you’re wanting. Google Classroom Banner slides should be pixels of 800X200, if you’re wanting something more movie size try the 16:9 Widescreen. To set your slide size go to file, page setup and choose your size or customize your own.
Next get ride of the boxes on your blank slide and decide on a background to suit your theme. Mine was a Star Wars theme for May the 4th Be With You so I put choose a background from by computer. (Bonus fun tip #3 – the official Star Wars site currently has a ton of backgrounds available to download for Zoom backdrops that work beautifully on Classroom and Movie backgrounds). To choose your background go to Slide – Change Background. You can either choose a solid colour for your background or (my favourite), choose image. If you choose image, you can either upload from your computer by pressing browse and finding where you saved your image, or choose Google image search and use keywords to find the best background image for your theme. If you are creating your animation for your Google Classroom header then check out my fun backgrounds that I’ve already made up in my TPT store including a freebie!
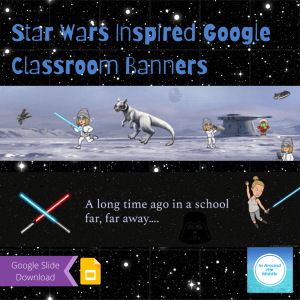
Now that you’ve chosen your background you need to decide what it is that you want to animate. In my Star Wars one I created a light saber fight scene between my bitmoji and Darth Vader. You may want your bitmoji to run across the classroom and slide into their seat or trip over sending all their papers flying. What you want to happen in your scene will determine what else you need to add to your first slide. Now is the time to add any other images you need to complete your background. Chair, desk, couch, papers, whiteboard, pictures, books, Darth Vader, light sabers…. To find your extras go to insert – image – search the web (or upload from your computer if you already have them ready). When searching the web I recommend adding in transparent to the end of your keyword to make sure it’s a transparent image and won’t come with its own background. Set up your background as you want it as this will remain throughout your animation.
Once you’re happy with the scene you’ve set you want to duplicate your slide. I recommend 8-12 slides. To do this go to Slide – Duplicate Slide. Now it’s time to place your character ready for the animation. Make sure you place it where you want it to first start in the scene. For me I set my bitmoji (read my post below if you’re not sure how to set-up bitmojis) facing off with Darth Vader. Go to your next slide and move your character(s) over a couple of centimetres. Keep repeating this with each slide. You might want to change the pose your character is in as well by making it run, duck, throw their arms up, site, slide… You can check your placement of your character by clicking on the smaller slide on the left and using your arrows to move up/down quickly to simulate the animation.
Once you’re happy with your slides it’s time to animate it using Creator Studio. Go to add-ons – get add-ons and search for Creator Studio. Choose Creator Studio and select install. It will now show up under add-ons. Go to add-ons – Creator Studio – Open. Your output width is the width of your slide in pixels. If you can’t remember your size go to file – page setup – custom – pixels and it will tell you how many for the width (the first number). Put this number in your output width (length with automatically be calculated). Change the interval to 0.5 seconds. Click Go. When it’s finished your gif will now be automatically put into your drive. Right click on your animation and select download. It is now ready to be uploaded to your Google Classroom Banner or shared with your class!



 In case you’ve missed it – a Bitmoji craze has hit teaching with a full frontal force! I have spent waaaay more time creating Bitmoji Banners for my Google Classroom then I care to admit. What can I say besides it’s really quite addictive and fun. What started with Harry Potter themed Banners (of course) went on to Disney inspired ones followed by Superhero, Gaming and Star Wars! Want to try your hand at it? Here’s the basic process I used and a few tips to help you to create your own.
 Now to decorate your background! Go to Insert – Image – Search the web. The search box will appear to the right of your screen. I like to stick the term transparent after my search word so I’m finding things that will drop in easily (it’s not a fail safe but it helps). Try search terms like couch, chair, office chair, teacher’s desk, desk, bean bag, whiteboard, chalkboard etc. You can add picture frames to your walls, flowers to your desk, windows on the walls and so much more (see how you can lose hours).
 Now for your bitmoji. You will need to download the app to your phone (it’s a green square winking). If you don’t have a Snapchat account you can just sign up with email. Go through the process on your app to choose your avatar and dress them. Once you’ve done that (don’t forget your password you set) open a Chrome browser on your computer and do a google search for Chrome extension bitmoji. Add it to Chrome and login. It will now appear next to the web address bar at the top of your Chrome browser. When you’re ready to dro
 p in your bitmoji just click on the little icon and it will open up with your latest avatar and clothing. Now you need to decide what position you want your avatar to take. Searches like pose, sit, hole, run work well. If you’re having trouble scrolling down to see them all just click your cursor on the very right edge then you should be able to use your arrow keys to go down. Once you’ve chosen one just drag it straight onto your background. Once it’s there you can re position and drag the corners to change the size.
 Once you’re happy with your banner, to insert a new banner into your Google Classroom first you need to download your banner as a photo. Click on the banner you want to use. Go to file, download, JPEG image. Your picture will be in your downloads. Copy and paste it from your downloads into somewhere you can easily find and remember. Now, simply – Login to your Google Classroom page. From the Class Stream page, in the bottom corner of your existing banner select upload photo. Choose Select a photo from your computer, direct it to look where you saved your banner download and select Open. Then drag the corner of your Banner out to fit where you want it on your photo – keeping in mind that your class name appears in the top left corner so you don’t want it to block important information from your picture. Click Select class theme and your new banner will be in place! Remember – Google Classroom puts its own dark filter over all banners so unfortunately the banner picture won’t be as bright as the original. At this time there is nothing that can be done about this other than going to their website and putting in a request for future updates.



 I am part of a pretty good team of teachers in my building and everyone had been saving ideas for weeks about what could be included in their program so we had a lot to choose from. If you haven’t already checked out
  Cue South Australian Corona Virus numbers. Here in South Australia we have managed to really clamp down on our numbers quite quickly. For once it has paid off being a sleepy little country town – it’s not a huge tourist attraction, it’s not a jumping off point for international flights (we need to go to Melbourne, Sydney or Perth before going pretty much anywhere), and we’re not a cruise ship docking point. So the past week has seen consistent numbers of zero-two new cases per day. Now, this is fantastic news – people are listening and staying home and we are on top of the outbreak here. For teachers though this comes with a knowledge that it most likely won’t be 16 in my class next term after all. So I will be supervising almost a full class and trying to support those at home at the same time. It’s also quite possible that the State Government will now turn around and say full classes resume and send your child back unless they or a family member are high risk. Now, like most teachers I do the bulk of my planning and prep during school holidays each term for the following term, because there’s just no time during the term for marking, feedback, adjusting lessons and for planning new units. So, now my HASS unit also needed to be able to morph between an online unit of work and a regular classroom unit of work as needed. Oh – and did I mention I have a student teacher for the first six weeks of this term – yup I do.


