November 24

13 End of the Year Classroom Activities

In Australia, the end of the school year coincides with the Christmas holidays which means even more interruptions and chaos. I can’t count the number of times a week that I have students missing out of my class during the week because they are on certain committees, rehearsing for concerts, bike ed, swimming, and the list goes on. Having a split 4/5 class makes it even messier as some activities are for the year 5s only. Planning for meaningful end of the year classroom activities that can still be finished in a single or double block of lessons can be difficult so I’ve come up with some low-prep activities that still have students learning but keep them engaged in end of school year classroom activities without turning off and thinking their year is finished. These ideas keep it educational, keep it interesting, and keep it relevant. Most importantly it doesn’t matter if some kids miss out, these can be done in one or two lessons and don’t need to be carried over.

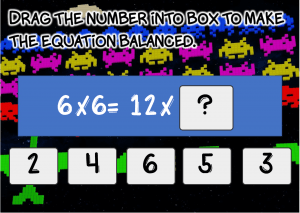
  1. Reveal Pixel Art.  If you haven’t tried these out yet then you are in for a treat. Students answer questions into a Google Sheet (no excel coding knowledge required), and if their answer is correct, then part of the mystery picture is revealed. Each correct answer reveals a new section of the picture. These make for a fantastic end of the year classroom activities as they can be finished in a lesson, are engaging for students, and definitely fit in with learning they have done throughout the year. I’ve written another blog post all about how to create your own Pixel Art Reveals which you can find here, or if you haven’t got time to create your own I’ve made some for multiplication, Area and Perimeter, or Angles that are for sale in my TPT Store here.

    Pixel Art reveals- engaging end of the school year classroom activities

  2. Whodunit Review Game. These make a highly engaging end of the year classroom activities or anytime activities. Like with the Pixel Art reveal, students are highly motivated to get the answers correct. The way this works is like a game of Cludo (or Clue in North America), whereby solving questions students receive clues to help them solve the who, what, and where of a crime. I recently created one using an Among Us inspired theme where my students had to correctly classify angles to reveal who the intruder was, what crime they had committed (I took the murder-y ones out), and their last known location. They loved it!

    Among Us Themed Escape Room make a great end of the school year classroom activities

  3. Class Yearbook/Memory Book. Put some frame shapes on a page with titles like those below. Have them design their own cover page or give them one to build from. The best part about these is that you can make as few or as many pages as you need and if some students are out of the classroom, their books can have fewer pages. It’s an easy end of the year classroom activity to pick up when you only have short blocks of time or do for an entire lesson at a time.
    • What I will miss most about my class
    • A classroom memory
    • My funniest memory
    • My favourite spot in the classroom
    • A highlight from camp (or field trip)
    • Sports Day
    • My favourite event
    • A time I was (and use your school values)
    • All about my friends, teacher, me
    • Best books I read
    • Moments to remember
  4. Virtual Reading Rooms. The end of the school year also means the library books are returned for stocktake. Try out a virtual reading room instead. Students will love the idea of being able to choose their own book. So many big-name celebrities took the time to read books online this year that it would be a shame not to take advantage of them. They are straight forward to put together in Google Slides and link the books to the videos. Check out my blog post about virtual reading rooms here. Again, if you’re short on time check out the Virtual Reading Rooms I’ve created here.
  5. Whole class review games. I don’t know about your class, but I have spent the year hammering multiplication tables into my students and they are still not getting the speed and accuracy I wish they would have. Who class games are great for this. I even created a bingo multiplication game that I play with my students on their computers. Way less mess, no missing game pieces, and more than enough gameboards without doubling up – and best of all no colour printing, laminating or storing! I gave each student a copy on Google Classroom, had them choose a gameboard and I put a random double dice generator on the board. Depending on how much time you have, you can play one line, two lines, or blackout. The students love it and it’s an end of the year classroom activity that can be done again and again and again.

    Online on printed out Multiplication Bingo makes for great end of the school year classroom activities

  6. STEM Challenges. Now I am a huge STEM fan and don’t generally like the quick ‘STEM’ activities that you see everywhere. To me, I really want to see the thinking and ideas stage flushed out as well as the testing, fixing, and re-testing faze. When I have a more limited amount of time what I like to do is to present students with a problem and let them do the brainstorm, quick (and I like to set a timer on this of 5 minutes to add pressure for a good search) online research, and a labeled diagram of what they think the best solution is. I then have them develop an ‘elevator pitch’ – this is a 30-second pitch that they have to give to the class on why their solution is the one that will work pointing out features and strengths and using their diagrams. I tell them to imagine they have their boss in the elevator with them for the trip up to the top floor so it has to be an amazing 30-seconds that outlines how their solution will fix all aspects of the problem. Put a timer on the board and make them work under pressure throughout. This is so much fun to do and makes for such a high adrenalin end of school year classroom activity that they will be asking to do another one the next day. The best part, all you need is a problem and a notebook or computer for each group to work in.
  7. Google Classroom Banners. If you’re looking for end of year Google Classroom Activities why not have your students design Google Classroom Banners. They are easy to make, just have them create a Google Slide or Google Drawing that is 1000X250 pixels and add whatever theme or decoration they want or give them a theme or challenge. You can select the best ones to make your classroom banner. Choose a different one each day for the remainder of the year! Once they’ve finished they can export it as a jpeg. Create it as an assignment on Google Classroom and give them a ready-made template and then they can turn it in that way or attach their jpeg, otherwise, just have them share it with you (I discourage my students from sharing docs with me as it clutters up my drive). I have a few blog posts on Google Classroom Banners that go into how to make them in more depth here.

    Creative and fun end of the year classroom activities have students make their own google classroom banners!

  8. Group Story Writing. This is a fun end of year classroom activity. Even though I prefer digital for a lot of things, I do this one the old-fashioned way, on paper. There are a couple of reasons for this. The first one is that sharing that many docs get messy and cluttered, the second one is that students can delete what others wrote. Put a picture up on the board for students to use to write about. Tell them they will be given 1 minute to plan how they will start the story and then they are going to do a ‘fast and furious’ write for 2 minutes. At the end of the 2 minutes, they have to pass their page to the person sitting directly behind them (or next to or whatever works for your class set-up). That person then has one minute to read what has been written and plan how they will go from there before another 2 minutes of’ fast and furious’ write takes place. The rule for a ‘fast and furious’ write is that students must write non-stop for 2 minutes, no stopping to think, no erasing, nothing. It’s a lot of fun and the panic really adds to the giggles of the activity. Continue doing this for a few rounds and when you’re ready tell students that on the last round they have 2 minutes to finish the story off with a good conclusion. When this is done the paper goes back to the original owner to read it through. They can swap them around to share the stories if you like or read them all out loud.
  9. Virtual Excursions. If you can’t get to Harry Potter World (sob) then bring Harry Potter World to you. I love Harry Potter and so do my students. Being in Adelaide makes it pretty difficult to take them to Harry Potter World though, with or without Covid. So I created a virtual excursion into all things Harry Potter (find out how to make your own in my blog post on them here). They get to experience first-person Harry Potter-themed rides at Universal Studios, Google Map links to some of the real-life filming locations, 360-degree tours of different rooms from the movie sets, Harry Potter Quizzes, the wonders of the Harry Potter and the History of Magic exhibition at the British Library, more information on each of the Hogwarts Houses and so much more! If Harry Potter isn’t your thing then check out my Animal Safari virtual fiend trip or try your hand at creating your own virtual excursion!

    Virtual Field trips are a fun end of the school year classroom activity when you can’t get there in person

  10. Get them outside and learn a line dance or the latest dance craze. Research a bit beforehand on youtube or ticktock to find something fun or go with any country line dance. Don’t have a way to bring the music outside? Push your desks to the side and do them in the classroom! After all, nothing says the end of the school year activity like a performance!
  11. Found Poetry. Ask the librarian for any novels that are being removed or have been damaged beyond repair and give each student a page out of the book (or grab one from your local opp shop). Students then create a poem by blacking out all of the words on the page that aren’t part of their poem. Those that are left create their poem. I have them start by going through and circling their poem lightly in a pencil so it’s all planned out beforehand. A quick Google image search will bring up some great examples for your students.
  12. Kahoot. I probably don’t even need to say more. Students love it. There are so many fantastic Kahoot quizzes ready to go on there. Search for your latest science topic or class novel. The possible topics are endless. If you want something specific, it is straightforward to make your own.
  13. Grafitti Wall. Cover a big section of one of your classroom walls with paper (the back of your pinboard paper that you’re taking down anyway is a great way to recycle and not waste paper). Give students a theme or come up with one as a class and let them at it. I make sure I have strict rules in place around appropriateness, destroying others’ work, etc when I do this. Another tip to eliminate problems is to give each student a section that they are responsible for.

Bonus End of the School Year Classroom Activity #14

Chalk Memories. Take the last of the sidewalk chalk out and have students write and draw about their favourite memories of the year. You might give them a planning sheet beforehand and do a class brainstorm for ideas.  A discussion around appropriateness and respecting others’ work is always a good idea for this activity as well.


November 1

Top Three Tips for the End of Year Contract Teacher Dilemma

Top Three Tips for the End of the Year for Contract Teachers

While most teachers in the Southern Hemisphere are counting down the weeks till the end of the school year and a much-needed break, this is also the time of year that contract teachers begin to get nervous and worried about what they will be doing next year. The uncertainty of this unknown makes term 4 even harder for them. 

For contract teachers that haven’t been teaching long, they don’t even know what to expect or know what their place is. I often get asked what I think numbers will look like for the following year or when is a good time to speak to the principal, or how can they reach out to other schools.

There isn’t a lot of organisations that have such an enormous number of non-permanent workers as the education system. Good teachers can spend years on the merry-go-round of contracts before finally winning a permanent teaching job. This often means that contract teachers don’t want to be seen as ‘rocking the boat’ and can be left wondering who they can ask about what they should be doing next.

With this in mind, I thought I would create this blog post with my top 3 tips for teachers in contract positions, those doing relief work and wanting contracts, or those just graduating and getting their registration.

Tip #1 – When to Approach the Principal

End of Year Contract Teachers Tip #1

Once class configuration has been discussed and finalised (or narrowed to two possibilities based on close numbers) then it’s worth a quick chat with the principal. Generally speaking, principals are aware that if you’re on a contract that you’d like to be back, but it’s always good practice to actually say it. Also, let them know what your ideal spot would be but also what you would be willing to take on. If you don’t mention what you’d be willing to do something may come up that doesn’t get offered to you because it was assumed you wouldn’t want it. Sometimes there are also staffing changes they know about that haven’t hit the school rumour mill yet.

After that leave it be till early in the last week of school if you haven’t heard anything yet. Not knowing is hard, but they can’t confirm any kind of offer, even a maybe until it’s gotten the go-ahead from Human Resources. That being said, principals are also generally good about letting you know if chances are slim. Which brings us to our next point.

Tip #2 – Reaching Out to Other Schools

End of Year Contract Teachers Tip #2

If you get told that because of falling enrollments or permanent teachers returning to right of return positions, ask the principal to mention you to other principals in your partnership of schools. Principals talk all-the-time. I’ve known teachers who have missed out on contracts at neighbouring schools because their principal didn’t think of them when it came up! Asking for them to recommend you keeps you at the top of their mind when it comes up.

Send your resume and cover letter out to all of the principals at schools you’d be willing to teach at. You never know which school may be ‘out’ of contract teachers and have a position they need to fill. Be clear in your cover letter what you are after. Include a fraction of time, year levels, and any specialist areas you’d be willing to teach. Look at their website before you send it so personalise your resume with the training you’ve done that is a focus for their school. On your resume include your teaching experience as well as any training you’ve had especially if it’s in the latest and greatest thing.

If you’ve got solid classroom management, try reaching out to those lower category schools whose students can be a bit more difficult to teach.

Tip #3 – Week Zero

ow? Top Three Tips for End of Year Contract Teachers Tip #3

Before most contracts can be filled, permanent teachers without a school need to be placed first. A lot of times this means the waiting game for principals. To get the person they want they have to wait until all permanent staff has been placed and this might not happen until just before (and sometimes just as) school goes back. School leadership returns officially Monday of week 1. Send an email then, that way it’s at the top of their email list and not buried because you sent it January 1st and they haven’t opened emails since Christmas.

Teachers are back two days before schools starts and the dates vary each year dependant upon the long weekend and school start date. These two days are crazy and you won’t find anyone from leadership available. If you want to stick your head-in in person then I’d aim for the 3 days leadership is officially in before the rest of staff (we all know teachers are still there, but leadership isn’t in staff meetings or training with them).

If you’re just dropping off a resume and authority to teach as a cold call and to get on the relief teacher list, ask if anyone from leadership is available to introduce yourself to. There’s often a day or two contract up for grabs because a teacher has reduced their time unexpectedly or a part-time contract person has been offered a full-time contract somewhere else. You could be in the right place at the right time!

There are a million other things that influence staffing matters and lots of other questions that early career teachers have this time of year. Let me know below what yours are and don’t forget to put your name down on my mailing list to keep updated on my posts!

August 23

Taking the Messiness out of Creating a Differentiated Spelling Program with Notebooks

Boom Cards and Digital Spelling Notebooks

Creating a differentiated spelling program

I’ve spent a lot of the last few years thinking about how I can make my spelling program more effective. Having found a developmental spelling program that I am happy with (Words Their Way), I’ve been refining how I deliver and guide this spelling development and how my students go about learning the spelling rules and processes.

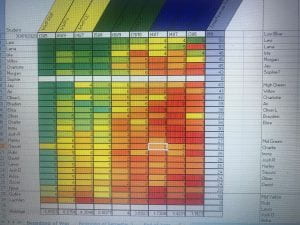
My biggest issue has been the messiness of trying to deliver a differentiated program with groups at different levels. Too many groups meant that I couldn’t work with all groups to ensure they understood the spelling rule/pattern they were to be learning.  Too few groups meant that students were not addressing gaps in their spelling development. I had chosen Words Their Way because the Words Their Way assessment clearly showed me where the gaps were in my student’s spelling development and what rules they needed to learn and understand in order to close those gaps and I really think this needs to be the first step you do – find a program that identifies the gaps in their knowledge and understanding and sequentially teach them these rules and patterns. With the Words Their Way assessment test I was even able to translate it in excel to produce a graph that made it super simple to group students based on their gaps. So teaching them those rules and having them practice applying them needed to be at the forefront of how I delivered spelling in my classroom. Of course – I’m only one person.

Words Their Way class groups

How to make spelling groups using Words Their Way

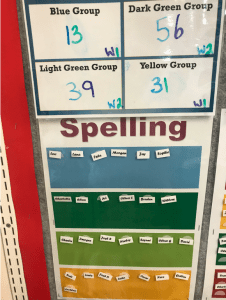
I tried staggering the start times so I could work with each group at the beginning of them receiving their new rules, but that was messy as I couldn’t have end-of-week due dates for everyone’s work and it made it difficult for students when they are still learning to self-manage their time effectively over a week. So I’ve made each rule go over two weeks and have grouped together my top and bottom group to be both doing week 1 activities at the same time and my two middle groups both doing week 2 activities at that time. This way everyone had Friday due dates but only the two groups on week 1 activities needed to be spending time with me picking apart their spelling rules/patterns. For me this was achievable.

Making spelling groups with Words Their Way

My spelling group organisation with Words Their Way

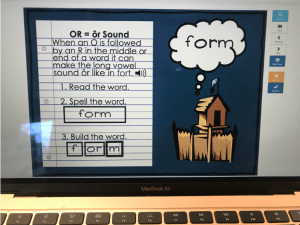
My lower level of spelling students always seemed to be those students who take forever to cut and glue. Quite a few of their words ended up on the floor lost as well. This was a big issue. I loved how Words Their Way has students sort words into patterns/rules and take a close look at what they notice about syllables, phonics, and other particulars of the English language but the time lost to cutting and the lost words were too messy. I tried envelopes and zip locks but the same kids lost or ruined these. I tried pre-cutting but this took way to much of my own time which like most teachers is in too short of a commodity to start with. That’s when I started making Boom Cards for my bottom group. I could have them sort, stretch sounds, re-read rules, record my own voice so they could listen to the sounds they were looking for, practice spelling the words grouped together by rule/pattern and even having a closer look at oddballs and homophones if they were present in their sort. I’ve talked about Boom Cards with my spelling program in another blog post so I won’t go into any further detail here, but they removed a big messiness factor.  I’m loving these so much that as soon as I have finished the sorts for my yellow group I will move onto the green and blue books so I can get all of my groups using these.

Boom Cards Digital Spelling Notebook

Using Boom Cards for Spelling

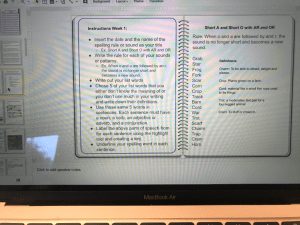
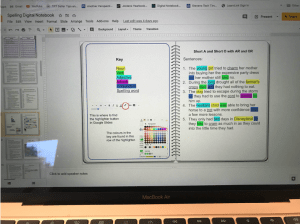
The last part of my messiness is with the actual practice and activities themselves. I have always given students a list of instructions and activities that get put into their folders for easy reference. It tells them exactly what they need to do each week, how many different activities they need to do, and what each activity should look like. But here we are, almost 3/4 of the way through the school year and when some students hand up their book they have forgotten parts, left out activities or repeated activities they’ve already done. I’m still digging through their folders to find they’ve done the impossible and lost their sheets yet again. So I decided to try a digital solution. I created a digital interactive notebook for spelling. I used a double-page spread notebook and have put the instructions and activities on the left-hand side and left the right side blank for the students to do their work. Through Master Slides I created the layout for them to use so their work was neat and easy to read. They could still do written activities (like writing their words in chalk outside) by taking a picture and loading it onto their page. They could still do every task they do in their book but would now have the instructions and options right next to them every single time. I even added an index to each unit so they could write down their spelling pattern/rule and the slide number it could be found in so they could go back and use it as a reference easily. The index is taking some modeling, practice, and reminders but it has been really useful so far.

Digital Spelling Notebooks

Digital Spelling Notebooks

Now, where I’m at in creating a differentiated spelling program that isn’t messy is by no means perfect, but I am finding that it has become quite effective in both improving my student’s spelling development and managing my time and letting me be where I am most effective during spelling lessons – explicitly teaching and reinforcing the new rules/patterns with small groups of students.

Digital Spelling Notebooks

Digital Spelling Notebooks

Taking the messiness out of my differentiated spelling program:

  1. Find a program that will clearly identify what gaps the students have in their spelling knowledge and understanding.
  2. Group Students. I grouped students grouped into 4 differentiated spelling levels based on their developmental spelling gaps from the Words Their Way assessment.
  3. Each rule learned and practiced over 2 weeks – not 1.
  4. Two spelling groups on Week 1 activities and working with me while the other two groups are on week 2 of activities and no longer need my explicit support.
  5. Boom cards replacing cutting and sorting.
  6. Digital Interactive Notebooks for Spelling practice and activities – more organised and less mess.

I’d love to hear if you have any other tips for making differentiated spelling manageable!

Boom Cards for Words Their Way Digital Spelling Notebook for Words Their Way Boom Cards for Words Their Way Boom Cards for Words Their Way Words Their Way assessment tools spelling groups

August 15

The Nitty Gritty on Boom Cards for Digital Spelling

In my last post I talked about why Boom Cards weren’t just for little kids and how I have found success (and less marking!) with them in my year 4/5 class. I also promised a bit more on what my dad always called, the ‘Nitty Gritty’ on Boom Cards – what you need to know about how to sign up, what membership, costs, using the reports etc, so here it is.

In a nut shell Boom Cards are interactive, self-marking digital task cards that you can set for your students and get real-time reporting on how they went.  If you’re wanting to set them up for your classroom, then here’s what you need to know.

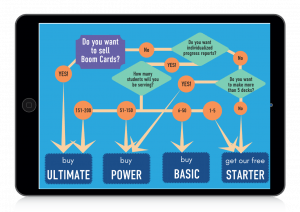
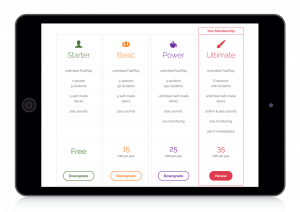
  • Costs – There are four different levels of Boom Membership you can sign-up for. Costs vary from Free-$35USD. There is currently a free trial offered until December 31st, 2020 for anyone who has purchased a Boom Deck elsewhere (like on TPT) and has never had a Boom Membership before.  It gives you 90 days free access which lets you try out a bit of everything available on their site.  With the free trial, you get 3 classes, 150 students, access to student reports, fast pinning, and allows you to make 5 free decks of your own. At the end of this trial you’ll have a pretty good idea what membership you want to access. That being said, here’s the run-down on membership inclusions and a flow-chart to help you choose.
Boom Cards by Boom Learning

What plan do I need to use Boom Cards with my class?

Boom Cards by Boom Learning Costs

Costs for 1 year on Boom Learning

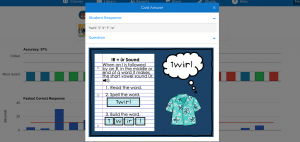
  • The ‘lingo‘ used in Boom Cards. Boom cards are digital which means they are hosted on the internet on the Boom Learning Site and you will need internet to access them. They are self-checking so students know right away if their answer is right or wrong (so no marking for you), and depending on your membership level student reports will tell you which answers individual and whole class got correct/incorrect.
    • Each page is called a Card and a set of Cards together is referred to as a Deck (a deck of cards). Multiple decks can be put together in a bundle and are generally at a reduced cost.  Boom Cards contain a variety of answer types including:
      • fill in the blank (which may or may not be case sensitive)
      • multiple choice
      • picture multiple choice
      • drag and drop
  • All decks in the Boom Learning Store allow you to preview the first 4 cards for free to give you an idea of the quality of the work. It’s still good to read the write-up though as it may be that the deck offers different question types and complexity than what the first 4 cards show. Many decks have a link on TPT to the 4 card preview as well under View Preview.
  • Setting up your class is easy. Go to classes. If you have Google Classroom select import from Google Classroom and select your class, students will now login with Google. If you don’t have Google Classroom select New Classroom and Add Many Students.  Enter nicknames for the students and Boom will automatically generate them passwords. Simply print them out and give them to students.
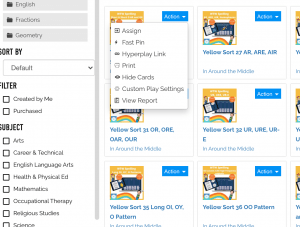
  • Boom Cards can be played in 3 ways: Fast Play, Hyperlink or Assigned.  Fast Play comes with the free account and can be used on any purchased or free decks on Boom and students do not have to sign in, however student progress reports are not generated. Hyperlink is exactly as it sounds, you can send students hyperlinks of the decks you want them to complete.  Students do need to sign in and their progress is kept for reports. Finally, Assigned is when you assign a deck to a whole class or individual student, this can be done through both the class tab as well as your library. This allows you to give different decks to different students and differentiate their learning without too much effort.
Digital Spelling Words Their Way Boom Cards

How to assign Boom Card decks to your class

  • Making decks.  All membership levels allow you to make at least 5 of your own decks.  They are not hard to make and offer a fantastic opportunity to create exactly what you want for your students. There are lots of fantastic videos on the Boom Learning YouTube site to guide you through this.
  • Points and purchasing decks on Boom. The whole point thing may sound a bit confusing but it really comes down to how much do you plan on buying. The more points you buy at one time the cheaper they are. Once you’ve bought points it acts like a credit that you have to spend in the Boom Store. You will find that many decks are only listed on Boom and not elsewhere (like TPT) so you may want to invest in some points.
Boom Cards by Boom Learning

How to buy decks on Boom Learning

  • Purchasing decks on TPT. There are a lot of Boom Cards listed on TPT and the number is growing as more teachers begin to discover Boom Cards. The great thing about this is that this means that when TPT has a sale on there’s a good chance that author’s Boom Cards will be on sale too. Generally speaking, when you purchase a deck of Boom Cards on TPT you will receive a download with a clickable link that will take you to redeem your deck on Boom Learning. If you don’t have an account it will prompt you to make one. If you are new to Boom and it is prior to December 31 2020 then you will get a free trial for 90 days that lets you explore all of the features available on Boom.
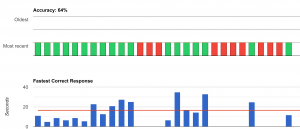
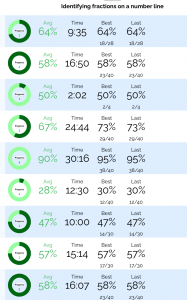
  • Student reports. Go to Reports, select a class, select a folder, select a deck. Your class list will appear with an overview of student results for the whole class. On this page it will tell you how many questions on average students have gotten correct, how long they spent working on it, how many cards they got correct the last time they completed the deck and how many cards they got correct on their most successful attempt at completing the deck. If you click on an individual child and select the deck, it will show you which questions they got correct and which they got wrong. If you click on the green/red/blue band (blue means there are no questions on that card) then it will bring up a copy of the question for you to see.
Digital Spelling Boom Cards Words Their Way

Teacher report view

Digital Spelling Notebooks with Words Their Way Boom Cards

Individual question results by student

  • Boom has Gamified their platform. Students receive rewards for completing decks and re-doing decks which they can use toward upgrading their avatar.
  • Apps.  Boom Learning has Apps through the Google Play Store, the App Shop, for Chromebooks and through the internet (I recommend using Chrome).
  • They can be assigned through Google Classroom, Class Dojo, SeeSaw, Remind, Microsoft Teams, Canvas and more.

Anyway, I hope this answers a few questions about Boom Cards – and remember – They are FANTASTIC for older students too!

August 9

Using Boom Cards With Older Students

Boom Cards for Older Students

Boom Cards for Older Students

I can’t quite remember how I stumbled across Boom Cards, but I have quickly become a believer in them for older students.  They seem to have a reputation for use with younger students and for Speech support. I am here to tell you that this reputation is completely wrong! Seriously! I cannot recommend them enough and if you haven’t investigated them yet – get on it now. I signed up when they had a free COVID trial and paid for access after that. I’ll explain the costs/trials/options in anther post so won’t get into that now.

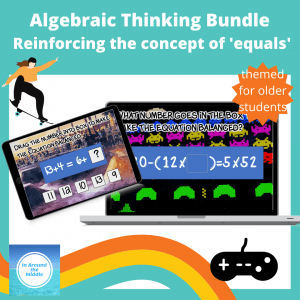
Boom Cards Multiplication for Older Students

Boom Cards for Multiplication practice

I started off creating decks for my lowest spelling groups which I’ve written about in an earlier post so again and have now added on decks for math. I’m sure I’m not the only year 4/5 teacher who finds it difficult to engage students in practicing their multiplication tables. I created some quick decks for 1-12 and set each student 3 different decks at a time to practice. At my school, we have the first bell in the morning when students are allowed inside and are expected to unpack their bags and get set up for the day before the second bell goes 5 minutes later. We then have a 10 minutes admin time for attendance etc. In reality, this time is usually filled with students (and prior to COVID parents) coming up to me with notes, questions, stories they NEED to tell me and this time is sort of ‘lost’. Now, however, students come in, unpack, set up, and spend that 10 minutes practicing their multiplication tables on their Boom Cards. I can still collect the notes, questions, and stories, but the rest of the class is settled and practicing something that REALLY needs mastering. As students think they are ready for the next deck they put their name up to be tested and I time them with flashcards (they need 25 in 60 seconds). Once they pass, I take that Boom Deck off their assignment and add the next one. This way they are practicing 3 different tables at a time which I find fits the 10 mins really well. Students can access these from home as well and I’ve had parents comment about how they’ve found their child on the site practicing in their own time because they enjoy it and love the point system (gems, coins for avatar upgrades, etc) which is built-in.

Boom Cards for Older Students

Boom Cards for fractions with Older Students

Boom Cards for Older Students

Boom Cards – Student results by question

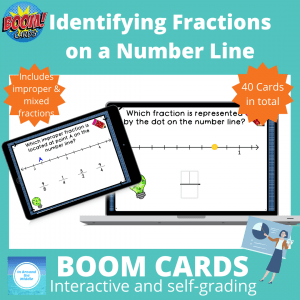
From there I created some decks for fractions. I wanted to see what students already knew so created a basic deck on identifying fractions, improper fractions, and mixed fractions before planning any more work. Once students completed the deck, using the report function I could see right away what they knew and didn’t know and was able to plan out where to start and which students to extend. The best part was that I could tell as soon as the lesson was finished as Boom Cards are self-marking and the reports are really easy to read. I then made decks for what I wanted them to practice. Students have really engaged with the Boom Cards. They like knowing right away which answers were right or wrong without having to wait for me to mark their books. I found that without even pointing it out to them that many students went into their results and could see which questions they got wrong. That when they click on the red/green/blue section it will bring up the question it refers to.

Boom Cards with Older Students

Boom Cards Class Results

To me, that last bit is the difference between using Boom Cards with younger students and older students. My students chose to engage with their results, to question where they went wrong, then came and asked me for specific clarifications. Once I noticed some doing this, I had them share their process and reasons with the class – and so many of them found this fascinating and exciting (I know, crazy right!?!). So, I went from wanting to create my own individualised solution for struggling spellers, to integrating Boom Cards into my morning routine and a weekly math activity as well. My students do not find it babyish as I make the decks myself and there are lots out there for older students you can buy as well. The fact that they are self-marking means that I can spend more time looking at what the student’s answers tell me about their understanding and what misconceptions I need to correct with them.
Digital Spelling Boom Cards with Words Their Way

Boom Cards with Words Their Way Spelling

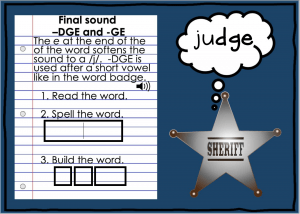
The other thing I like about them is that I can have a variety of different answer types. In one deck I can include drag and drop questions, multiple-choice, multiple-choice with pictures, and fill in the blank.  The nice thing about putting in the fill in the blank questions is that students can’t try out all the answers at random until they get the right one. For my spelling decks, I’ve added audio as well so students can have the instructions, rules, and sounds read to them in case their misconception is around the pronunciation of the sound.

Boom Cards for Older Students

Boom Cards for Math with Older Students

Even if you don’t have the time or interest in creating your own decks, there are some great ones out there for older students in a huge variety of subject areas, I’ll include a link to a few of mine in my TPT store that I’ve mentioned here below or check out my Boom Store. It’s really worth a browse. Each deck in the store has a preview button that lets you play the first 4 cards of the deck to get an idea of what it includes.

Boom Cards are so easy to use, are compatible with Google Classroom and Google Apps, Chromebooks, IPads – and these are just the things I’ve used them on so I’m sure there’s more. So do yourself a favour (especially if you’re remote learning), check out Boom Cards to use with your older students!

Boom Cards with Older Students Times Tables Boom Cards with Older Students Algebra Boom Cards with Older Students Fraction

July 13

Creating Digital Interactive Notebooks

Creating Digital Interactive Notebooks

Creating Digital Interactive Notebooks

There’s been a lot of buzz on Teacher groups on Facebook around digital interactive notebooks. Now, I haven’t used interactive notebooks in my class before but I got curious enough to look into what everyone was talking about.  Basically, students have a (very) sturdy notebook where they put the handouts from their teacher on the left-hand side of the book and their own notes, or practice work depending on the age group, on the other.  Basically, it gives all of the content in one place and acts as their own type of reference book.  As their year/term/semester goes on, students keep adding to the book.  Keep in mind, this is a really simplified definition.

I can certainly see how this would appeal for distance or hybrid learning.  Before heading into it, I would recommend thinking about a few things.

  1.  If you are going to pre-make these notebooks, you will need to have a really clear idea what content you will be covering and in what order.  Extensions such as Slip in Slide will give you some flexibility, but even this only lets you insert slides into the beginning or end of the Slide file so students will need to put it into the right spot in the book.
  2. It’s really hard to gauge where students are at and where they will get to when via distance or hybrid learning – so be prepared for the notebooks to get messy-you can tell them where to put the slides but…..
  3. Unless you have an existing interactive notebook you use and have refined over the years you will forget things which means we are back slipping slides in.
  4. Find yourself a team.  It is a LOT of work to pre-prepare an entire term’s worth of information before even starting so divide and conquer.  Teaching in the classroom requires a team – teaching digitally is no different.
Digital Interactive Notebooks Writing

Digital Notebook Divider

Still keen?  Having done a lot of things digitally over the years this is what I would do:

  1. My best recommendation would be to keep it simple.  Start with your core information and build things into your Master Slides that will help with organisation and flexibility.
  2. Use a tabbed digital notebook that has more tabs then you think you’ll need (check this one for older and younger students out here).
  3. Digital Interactive Notebooks for Writing

    Digital Notebook Planning Templates for Writing

    Add coloured dividers to Master Slides that match the tab colours.  This way when you want a section within divided up it’s easy to tell students how to add one.  You could even use the divider as a bookmark so students know exactly where to add their slide to that you have suddenly realised you will need to create because they are still not understanding something that now needs to be broken down further.

  4. Digital Interactive Notebooks

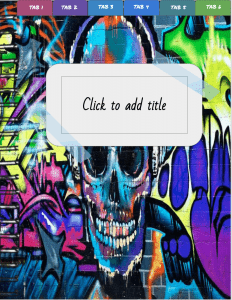
    Digital Notebook Covers

    Put notes around the outside of the page rather than on a separate slide, that way they don’t need to go back and forth.

  5. Make use of the fact that it’s digital to add the ‘wow’ factor for students – get them to add photos, clipart, colour, funky font etc.  You should be adding video links and pictures too.
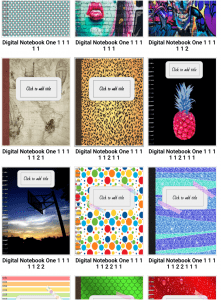
  6. Create a sense of ownership and pride in the notebooks – let them choose from a variety of covers, my students love this with their Digital Writer’s Notebooks, and then personalise them.
Digital Interactive Notebook Idea Generators for Writing

Digital Interactive Notebook Idea Generators for Writing

For the last 4-5 years, my students have kept a Writer’s Notebook.  They keep idea generators in here, quick writes, writing plans as well as a toolkit of skills and techniques that writer’s use.  I do a mini-lesson on a technique/planner/idea generator, then they add it to their notebook and practice it in whatever piece of writing they have currently chosen to work on.  Writer’s Notebook is separate from when I teach a specific text type, in Writer’s Notebooks students generally choose what they are going to write about.  I love Writer’s Notebooks and so do my students.  If you don’t know anything about Writer’s Notebooks then check out Aimee Buckner, Ralph Fletcher, or Two Writing Teachers Blog.  Why am I talking about this?  Because being in a 1:1 Chromebook school, many of my students asked to be able to do their drafts on a computer and not in their notebooks.  This would probably go against what the purist writers would recommend, but having two students with dysgraphia in my class who hate accommodations that they are convinced make them look different from everyone else, I thought I’d give it a go.

Digital Interactive Notebooks for Writing

Digital Interactive Notebook dividers

Digital Interactive Notebook for Writing Writers Notebook

Slide Master View Digital Writer’s Notebook

I came up with a digital version of the Writer’s Notebook, complete tabs, dividers, idea generators, planning mind maps, different sections for quick writes, drafts and polished work, and finally, some pre-loaded toolkits to refer students to during after mini-lessons.  Instead of putting my notes on one page and students on another like interactive notebooks, I decided to use the space around the slide to give instructions or put relevant notes in.  This way the notes weren’t in the way of their page but they didn’t have to flip back and forth to see them.  Duplicating the page would mean they would duplicate my notes as well.  I even put in notes about how to use dividers, hyperlinks between tabs and the front cover, and inserting more slides from master slides.  I added drag and drop activities, ones that asked them to insert pictures, selfies, clip art, and media inspiration to their ideas and writing.
That’s my version of a digital interactive notebook – give them the tools they need but build in the flexibility and knowledge to keep it as organised and easy as possible.

Digital Writer's Notebook Digital Interactive Notebook

July 2

Why I’m Using Google Slides for my Digital Notebooks

Digital Spelling Interactive Notebooks

Digital Notebooks with Google Slides

I promised a follow-up to my last post around how I and my students use Google Slides.  I’ve been asked about digital interactive notebook books as well so will do a follow up on that next maybe.  Let me start off by saying that I use Google Classroom so part of how I use Digital Notebooks involves Google Classroom.

Google Doc and Google Slides both offer some great ways to leave feedback and questions for my students in both temporary and permanent form.  The one thing that Google Docs allows me to do which Slides doesn’t is edit directly into student work and the changes show up as suggestions in the side columns for them to accept or reject.  It breaks any changes I make down for them to go through.  If I’m wanting to show them how to edit for a particular thing this is a fantastic tool, but otherwise I don’t do their editing for them – that’s their job.  So I don’t really mind leaving this feature behind and choosing Slides.

The great part about Google Slides is that you can put images, text, titles and media anywhere you want to on the Slide and it will stay exactly where you put it.  This makes them a lot more. interesting and interactive to use. Something that Docs (or Word) doesn’t offer.  Students can now think about layout.  For example if they are writing an information report they can easily position a labelled picture next to the relevant text without having to play around with text wrapping etc.  I can layout my assignments and pages exactly how I want them as well.
Digital Spelling Notebook

Adding comments to digital notebooks

Digital Interactive Notebook

Leaving comments to Digital Notebooks

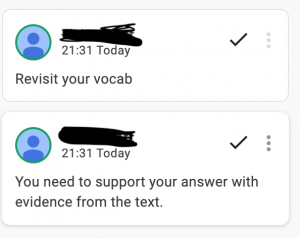
But the tools I use most in Google Slides is the add Comment button which is in your tool bar next to the lines – the icon looks like a speech bubble with a plus sign in it.  When I’m reading through their work whether it’s a piece of writing or questions for science I can click on the Add Comment button and give them feedback on what I’ve read.  Sometimes I’ll put multiple comments on a page.  I basically use them the same way I would paragraphs – new idea, new comment.  So for example, if they are doing chapter work on our class novel and need to fix up one of their vocab responses I’ll type up ‘revisit at vocab’.  Further down the page they might have completely missed the concept of what a literary devise is so I will put in a new comment – explain the term and ask them to try the question again.

Digital Interactive Notebooks

Leaving permanent comments

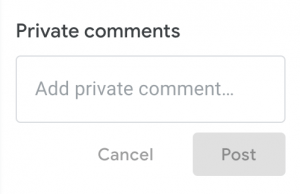
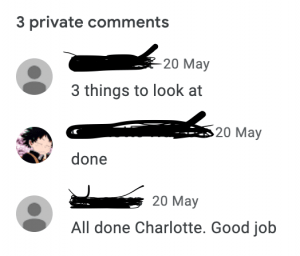
Once I’ve looked through the entire assignment then in the Google Classroom portion of the assignment where it says add private comment, I tell them how many things I’d like them to fix up or whether I’ve left some suggestions, feedback, questions on their work.  This might seem like double handling but once I put a private comment attached to the assignment, they can’t delete it.  Comments I add to their work using the add comment button however they are able to resolve without actually doing anything.  So my note to them as a private comment in Google Classroom both lets them know to check their work and also is proof that I’ve left feedback that they should have done something about.  Basically they can’t pretend they have no idea what I’m talking about!  Once those students have figured out there’s no escaping following feedback and that they have to do the work properly they stop trying to play the system and get on with their work.  You know the students I’m talking about.  I might just write something simple like two things to fix up, but it lets both of us know how many issues to go look for and can be a great time saver for the students as well.
Digital Interactive Notebook

Student responses to private comments

Students find it really easy getting my comments showing up in the margins of their work.  They don’t have to go looking for them.  The comments directly related to that slide are in the margins of that slide.  My students are able to reply to the comments in the margins but most choose to reply with any questions in the private comment section as well.  This is generally because they don’t want my answer to disappear when the comment is resolved or they want me to know they’ve made changes.

That brings us to resolving comments.  I’ve trained my students to not click on resolve comments.  Most of the time I want to go back in and look at their changes and I’m not going to remember all the feedback I gave to all 27 students.  If they resolve the comment then it disappears and if I don’t remember what changes I’m looking for then I have to read it ALL through again – no one has time for that!  This is why I’ve asked them not to hit resolve, that if I feel they’ve made the changes I was looking for then I would hit resolve.  This works for us 99% of the time.

Digital Interactive Notebook

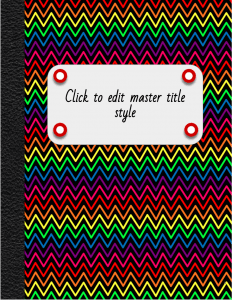
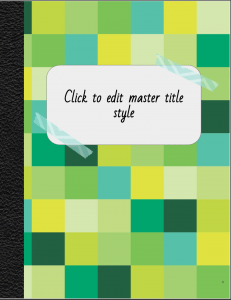
Digital Notebook Cover choices

Moving to digital notebooks I’ll keep this same system going.  Even though I will have long term due dates happening of semester or year long, I will still be able to go into their notebooks whenever I want or need and leave comments in Slides and a personal comment referring them to the Slide in the assignment in Google Classroom.  As time goes on the personal comments in Google Classroom will build up and will also provide me with a bit of a snapshot and pattern of their work and my feedback.  Super helpful to see their progress in one spot.  I can make the comments in the Google Classroom more specific around patterns I see, effort, common mistakes and so much more now that they’ll be in one assignment.  I can comment on their progress, what I’m seeing or not seeing.  This makes report cards and interviews so much easier too!  I’m really excited about this part of my digital notebooks – working smarter, not harder.

Check out my ready made digital notebook solutions in my TPT store.

June 28

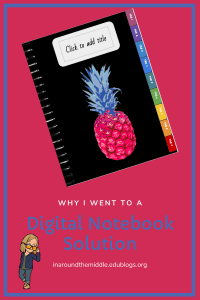
Why I Went to a Digital Notebook Solution

Digital Interactive Notebooks

Digital Notebook Solutions

As I’ve mentioned before, I’m in my second year using Google Classroom.  I used it the first year for some assignments but it wasn’t until this year with the whole pandemic that I began using it for a lot of what I do.  Part of this is that I began having students using it to link to other pages and activities and partly because I’ve begun to go a lot more paperless and a lot more online.  The other part is that I have learned a lot more about what I can do with Google Docs, Slides and Sheets that make things a lot more fun and interactive and save a lot of time for both me as well as my students.

The result of all this however is a LOT of things in my Google Classroom.  It’s organised under subject areas so students can easily click on the subject they want and it takes them to the most recent in that subject.  All my students are also back in the classroom so they know what needs to be done that week because it’s on the board.  The issue I have with so much on there is for example when I want to look at progress between multiple narratives or checking what feedback I left them last time to see if they acted on it this time.  I could, of course, create more specific topics and divide English further into writing etc but I would still have to flip between pages to compare.

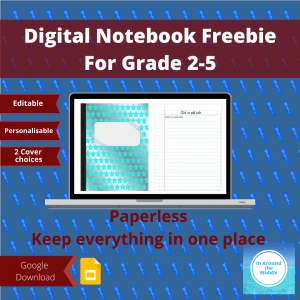
Digital Interactive NotebooksSo my solution I’ve come up with is digital notebooks.  I had seen them mentioned in a few Facebook groups so spent some time looking at examples and uses, watching videos and thinking about what I wanted out of them and created my basic notebook (there’s a link below if you’d like to grab a free copy of it for yourself).  My original intent was to have a basic notebook for different areas – so a writing notebook, a class novel notebook, reading notebook… but as I started mapping out what I wanted I realised this was already more notebooks then I wanted.  I wouldn’t use that many hard copy notebooks for students so why do that digitally.

Digital Interactive NotebooksSo I moved on to my next idea, one Notebook per subject area, similar to what I would give students in classroom supplies each year.  So, an English notebook, Science, HASS (Social Studies), Math, Technologies, Arts and Health.  I still needed it to be easy to find subtopics though (so solve my writing problem I mentioned above) so I decided that I would add tabs and dividers to my notebooks and hyperlink them all.  With that in mind, after a bit of consideration I decided I would narrow this down further and combine some subject areas.  My final version for Semester Two is as follows:

  • English
    • Tabs – Writing, Class Novel, Reading Comprehension, Spelling, Planning, Grammar
  • Original Fusion
    • Tabs – Science, HASS, Math
  • Secondary Fusion
    • Tabs – Design & Tech, Digital Tech, Health, The Arts

Digital Interactive NotebooksMy next step was to create a Notebook design that would fit all of these variations.  So I added in tabs and dividers, colour coded them then finally hyperlinked them together making sure that even if I added a zillion pages in-between that they would still connect between the tab and divider.  Because my main goal was to make it quick and easy for me for assessment and feedback, I added a hyperlinked home button to each divider as well.  At this point I was showing a colleague what I had developed so far when one of my year 5 boys came in from PE to grab his drink bottle, looked over my shoulder and let me know the cover was boring….thanks kid.
Digital Interactive NotebooksThis led to my next unplanned step, because well….he was right.  These are Notebooks for my students.  They need to work for both of us and the fundamental part of this is that they also need to appeal to them.  So I got lost in a fun creative place for a while and came up with 13 different covers I thought would appeal and a few more that were fun to make but I decided probably were a bit old for year 4/5s and put these into the master slides.

Digital Interactive Notebooks

Master Slides

Now I had my Notebook with colour coded and linked tabs and dividers and cover appeal.  Now I began planning what kind of papers I needed.  I figured I give my students notebooks that are either lined or have grids and they certainly seem to go through reams of blank paper so I would want these digitally as well so added them to the master slides.  If I was going to have them use lines though I wanted the writing to line up on the…..well lines.  So I played around with font sizes and styles in the master slides until they would line up properly.

Digital Interactive Notebooks

Instructions on side

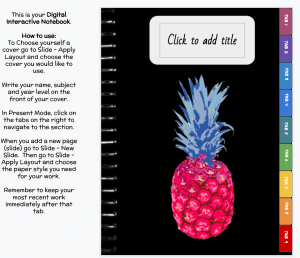
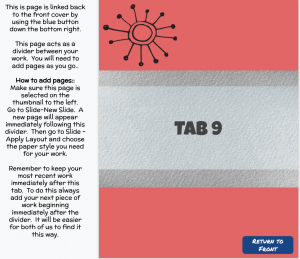
The next thing I added was student instructions.  The idea was to eliminate the need for students to constantly come back to me to ask how to add in more slides or any other instructions they needed until it became routine.  I decided to put these next to the cover slide and next to the divider slides.  That way they weren’t in the way of the page and less likely to be deleted by the student due to annoyance.  Next to the front cover I told them how to change the cover, the purpose of the notebook and how to use it.  Next to the dividers I told them how to add slides and that I wanted all new work immediately after the divider, not added to the end.  This part was really important because it would make it really easy for both them as well as me to find their most recent work as well as making it quick as we can navigate directly to the dividers quickly thanks to the hyperlinks and home button.  A bit like flipping to the back of their books to find their most recent work.  I had left room on the dividers with the intention to add permanent instructions for my students that are specific to the work in that divider such as the paper type default I want them to use in that section unless told otherwise etc.

Digital Interactive Notebooks

Dividers with instructions on side

That basically sums up my why and how for behind my Digital Notebooks and seeing as this is already quite a long post and I haven’t even spoken about how my students and I use the tools available in Google Slides to use the Notebooks to their full potential I might do a whole seperate post on using Digital Notebooks and Google Slides to their full potential so be sure to subscribe for the next instalment.

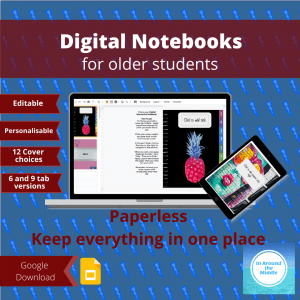
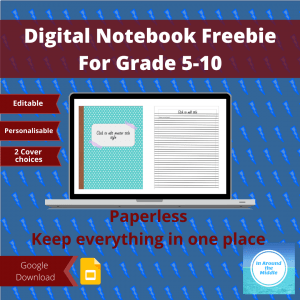
If you’d like a free version of my basic notebook I’ve included a link below.  If you’re interested in the updated ones I’ve create with tabs and dividers you can check them out in my TPT store using the links below as well.  Both the older and younger versions come in 6 and 9 tab versions in the same pack.  The older version has lines that are closer together so smaller font sizing and covers that would appeal to more high school aged while the younger version has lines that are further apart so larger font size (my students rarely zoom to 100% so larger is necessary!) and brighter, younger covers.
Digital Interactive Notebooks for Younger Students Digital Interactive Notebooks for Older Students Digital Interactive Notebooksdigital interactive notebooks

June 13

Having Fun with Pixel Art Reveals in the Classroom

I mentioned in my last post that I was going to teach myself how to make Pixel Art Reveals (also called Lite-Brite art) to use in my classroom.  Now, I’m at a school with 1:1 BYO Chromebooks and we used Google Classroom even before Covid-19, so I know that the ways I could use this wouldn’t change 12 months from now, and let’s face it, I thought it looked pretty cool when I did it so knew the kids would love it.  Besides, I figured I could use it across subject areas, not just math, though math is where I started.  For those who don’t know what Pixal Art Reveals are, they are built in Google Sheets/Microsoft Excel and when students put in the correct answer a pit of the pixel art is ‘magically’ revealed.  So basically fun and self-marking – win/win!  If you’re looking to create your own there are basically 2 stages:  building your pixel art, coding and dismantling your pixel art.

The Awesome Box

To create your pixel art start off in Google Sheets (or Excel but I use Sheets).  To begin with you want to reshape your cells so they are all square shaped.  To do that you need to click on the ‘Awesome’ box which is located to the left of cell A and above cell 1.  Clicking this box selects all your cells at once.  Once they’re all selected hover your pointer at the top of cell A where it meets cell B, you should get a blue arrow.  Use the arrow to draw the cell to a square shape.  All the cells will now snap to the same shape.  Keep fiddling until you are happy with your square (this can be fixed up after you’ve made your pixel art so don’t worry about it too much). Now while the cells are still all selected go to Insert – 26 columns right.  This will give you enough cells to work with.

Now you are ready to create your pixel art.  Start with a simple artwork the first time you do it.  Hop over to Google images and search pixel art.  Find one you like that clearly shows the lines between each square (easier to start with) and save the image.  Now go back to your Google Sheet and put your cursor onto the sheet somewhere and select insert – image – image OVER cells and choose the image you saved.  Now you can recreate the image next to it.  Simply choose a square cell to start with that will allow you room to build as needed.  Now click on your fill button and fill that square with the colour you want.  I tend to build mine by doing lots of the same colour to start with, that way I can just hit copy/paste in the other cells.  You can also drag and select a group of cells at once to paste or fill to save time.  Keep going and create your pixel art.

Once you have finished created your pixel art I delete any cells above my art work by selecting the number column on the left and edit – delete row.  I then repeat for the columns, leaving column A/B free for my questions and answers.  I generally want my picture to start from around cell D1.

Now comes the time to code my magic and dismantle my pixel art.  Before you start the next part I recommend you make yourself a copy so you keep a clean version of your art if you want to use it again with different questions/answers.  Before you start on the coding you need to decide how many question/answers you want your students to answer because this will determine how much/little you reveal with each questions.  You need to leave enough of your picture to reveal for all of your questions.  Once you’ve decided this you are ready to code.

I start by writing Question and Answer in Cells A1 and B1.  From now on I will be working just in column B.  Start off by selecting cell B2.  Go to Format – Conditional Formatting and it Formatting Rules will pop up on the right of your screen.  In the middle of this you will see where it says Format Cells if…. select the drop down menu and choose Custom Formula is (should be right at the bottom).  In the box underneath type in the code =$B$2=1  For the moment the number 1 is just a place holder for you.  This is where you put the correct answer you want your students to give.  I put in 1 because it’s easy to test that it’s working and I can worry about fully developing my questions/answers later.  The B2 part of the code references the cell you want students to write the answer in.  So basically the code says when you put in the number 1 into cell B2 that you want the program to do something.  Now we need to tell it what to do when the correct answer is put in the cell.


Go to formatting style and choose the fill container (see picture above middle).  Choose the matching colour of the part of your pixel art that you want to reveal with that question/answer.  All of the colours used in your artwork will be there, including any custom colours you used.  Once you’ve selected the colour go up the top of the Conditional Formatting Box where it says Apply to Range and select the 4 box square.  Another box will pop up (see picture to the right).  Now you want to click on the cells that you want to appear when the student types in the correct answer to the question (the part you choose the colour for).  Press down the command button (Mac) or Ctrl (Windows) to select more cells of groups of cells to reveal.  How many you select will depend on how many questions you want students to answer.  For example, if you are asking 10 questions then you want to reveal around a tenth of your pixel art each time.  If you are asking 25 you want to reveal a 25th each time.  Once you’ve selected all the cells you want revealed click ok.  Now click done at the bottom of your Conditional Formatting box.  You cells should still appear selected.  Go up to your fill bucket and click reset (see picture below).  Your cells should now be empty – time to test your code.  Go to cell B2 and type in your answer (1) and your cells should reappear filled.  If it doesn’t then go back and check your steps (remember, undo is your friend here).
Once you’ve tested your answer and your cells reappear coloured in, erase your answer and select the next cell underneath (B3) and repeat the process above changing the code to =$B$3=1.  Keep repeating the whole process testing as you go until all of your pixel art has disappeared.  Just because I’m a bit paranoid I then go back at the end and type in 1 to all my answers in column B till my pixel art is complete again.

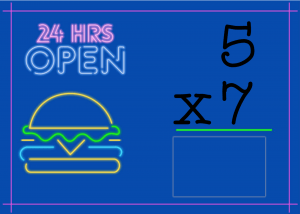
Now you can go and create your questions and answers you want your students to work on.  I create Google Slides with each questions and give my students working out sheets so I can see their work/thinking for some activities.  Other more simple ones, such as times tables practice, I simply type the question into my column A for them to answer in column B.  Once you have written all of your questions and answers you will need to go back into each code and put in the correct answer in place of number 1.  So if your question was 5X7= your code would now read =$B$2=35  A note on the coding – if you are wanting an answer that is not a number you need to put the answer inside quotation marks.  So if your answer was the word- painting – you would make your code =$B$2=”painting” If you can’t find your conditional formatting when you go back to put your answers in, just click the awesome box, go to format – conditional formatting, and they should all appear on the right.

This may sound complex but it is a lot of fun and if you want you can reuse each of your pixel arts by making a copy and changing the answer part of the conditional coding.  It’s also great for early finishers – I have my class calculate the area/perimeter of certain colours or the whole art work or even have them create their own pixel art for me to use (which they absolutely love doing by the way – a great digital media activity).  I haven’t taught them how to code yet but figure that will be my next step.  I can only imagine the quizzes that will start appearing after their presentations once they’ve learnt how to code their own pixel art!

I’ve put a few up in my TPT store if you want to check them out including a freebie for multiplication.  None are locked so after using them you can always go in and make a copy, change the answers and use them again with your own questions too now that you know how!

May 31

The Emergence of Global Virtual Staff Rooms

One thing that the Covid-19 pandemic did was push a lot of educators onto digital platforms and online learning whether they were comfortable with it or not.  A few months down the track and, if teacher Facebook groups are anything to go by, many are still wanting to be able to keep some elements of digital media in their face-to-face classroom and are beginning to question how they can use these new skills and platforms to enhance their regular classroom and teaching program.

I think as educators that we can all agree that students who are engaged get a lot more out of what we are trying to teach them.  While most of us here in Australia have been pretty lucky not to have online learning drawn out too long, teachers in other areas of the world have not been so lucky.  However, we’ve all benefitted from the fabulous imaginations that these teachers have used to keep their students engaged online when the initial interest of something new began to wane.  We’ve created our own virtual staff room of support and learning.

Fancy Google Classroom banners, digital classroom creations in Slides, animations, flat teacher, digital escape rooms, virtual excursions, multi-media use in learning programs, Boom Cards, Google Forms, Google Sites and so many other things.  There has also been an explosion of Facebook groups, blogs and YouTube videos helping each other figure out how to do these things – basically creating our own world wide virtual staffroom of support when we are pulling out our hair and out of ideas.  I have always love using tech in my classroom and was lucky enough to have Google Classroom already running at my school pre-Covid so my students were comfortable with the platform before online learning hit, but I am doing so much more with it now than I was before.  The best part of being in this virtual staff room?  It has shown me how much of the new stuff we’re trying out has turned out to be not just about student engagement, but about working smarter.  Yes, a digital breakout room is a fair bit of work if you are creating one from scratch, but once it’s working there is no prep (none!), self-marking (I’m almost crying in gratitude here), no packing up and figuring out storage, and is as easy as sharing the link the following year.  Boom Cards – once you have them they are no prep, self-marking, no storage and reusable.  The same is true for all of the things I mentioned above!  Three of my biggest time consumers gone – prep, marking, pack-up/storage – leaving me to walk and talk, question, observe, direct.  These are after all what I do best as a teacher.

My thoughts on moving forward?  Keep the stuff that worked and consider tweaking the stuff that didn’t.  Add these to the best of what you do in your regular classroom.  Why not add Boom Cards to your spelling rotation or math centres?  Create digital classrooms to contain all of your digital links to listening posts, reading centres or research activities?  Use digital breakout rooms for unit review or to support student learning in Science or History or anything really.

I just created my first digital breakout room to go with my History Unit on the First Fleet and Child Convicts.  We had looked at how the arrival of the First Fleet had effected the Aboriginal people but I wanted to also zoom out with my students and look at the big picture over time as well and used the escape room to do that (and timed it beautifully with Reconciliation Week I might add).  Changing track by using a digital escape room during the unit really engaged the students who had never done a digital escape room before.  The unit of work itself I designed not knowing how long we would be online learning for so it made me really put a variety of media uses into it.  We watched videos, used slide shows, online texts, comprehension questions, note taking, mind mapping (and I’m sure a lot of other things that I can’t remember).  Even back in the classroom, students have really responded.  They have enjoyed the variety in how the instruction has been presented to them and the variety in how they’ve been asked to respond and share their learning.

The next thing I plan on checking out?  Using Google Sheets to create/reveal pixel pictures.  I’m thinking times tables review/practice maybe to start with.  Haven’t figured it out yet, but I’m sure the answer is out there so I will fill you in once I have found it.

In the interest of sharing in my own virtual staffroom, check out my latest find – SlidesMania.com.  It’s completely free (yup) and has some awesome templates you can download for PowerPoint and Google Slides.  Don’t forget to checkout the By Edu for Edu section as well as I love the magazine template that is in there – I’m thinking of using it to create a class Magazine on Light and Shadows at the end of our Science Unit.  I’ve created the cover to use to get my class motivated when we’re ready to start.